

 |
Beltane 2009 |
 |
 |
 |
piece of pisces > neko manko chan > classique > be prepared >
what are you looking at? > little mary merkin > supurbia > mo' hair >
mer(maid)kin > fly fishing > dentata > high drama
Mama Cat (photo)
Anthony Ascione (model)
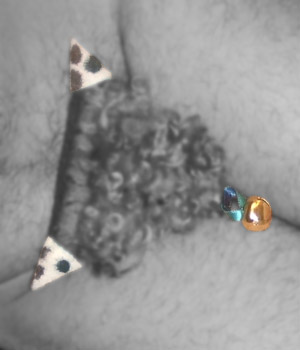
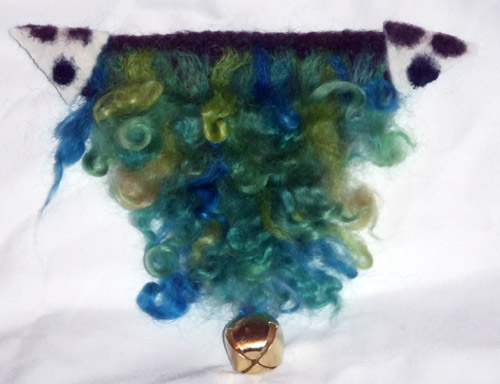
Neko Manko Chan displayed on the Mo' Hair merkin.
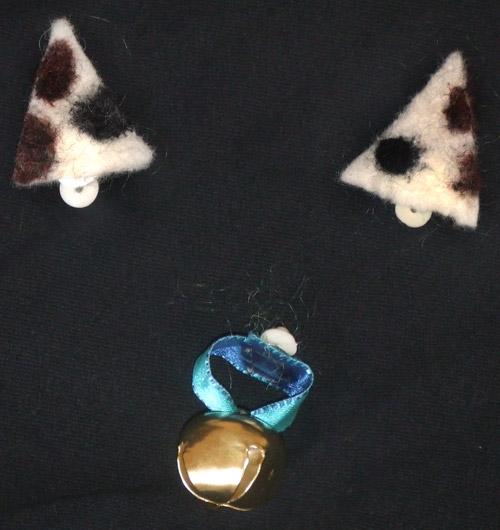
A set of merkin accessories: two cat ears and a bell collar. You know, in case they don't know it's a pussy.
Suggested Watching
All Purpose Cultural Cat Girl Nuku Nuku(1990-1991)
Difficulty
Boy Scout Dropout
Click here for definitions of difficulty levels.
Finished Measurements
Varies. These ears are approx 1.75"/4.5cm H x 1.5"/3.8cm W.
Materials
- .5 oz white wool roving
- Brown yarn scraps or roving
- Black yarn scraps or roving
- Felting needles
- Needle felting mat
- Soap, bar or liquid
- Short length of wide ribbon
- Craft glue
- 3 clip-on earring bases
- 1 one-inch bell
Design Notes
Anthony Ascione (photo)
Neko Manko Chan attached to Mo' Hair merkin.
click image to enlarge
In this project, you will be using two different (but related) methods of interlocking protein fiber to create a denser material which appears fused together.
"Fulling" is the term used for "felting" finished cloth, whether it is woven, knitted, crocheted, etc. This can be done by hand (which is traditional) or by washing machine (if carefully monitored so the process doesn't go too far for your purposes) with hot, slightly soapy water. The fabric will shrink as the individual fibers lock together.
"Felting" is a more general term, and is accepted to describe all fabric/fiber transformations in which fibers are shocked into fusing together. The application of heat (wet or dry) and aggitation is the most common means of felting. Fibers can be "dry felted" using barbed needles and repeatedly poking the needles through the materials to be joined. Felting needles come either singly or in sets, often secured in a special needle holding tool; there are also machines resembling sewing machines fitted with multiple needles which will needle felt fabrics and fibers even more quickly. In the needle-felting method, there is less shrinkage, though the resulting fabric becomes more dense.
In this project, you will be fulling wool into a sheet of felt cloth, and then needle-felting spots of color onto it.
Be sure to use 100% wool that is NOT superwash or your fiber may not felt.
Don't forget that felting needles are barbed and therefore it hurts like a sonuvabitch if you stab yourself.
Cheaters can buy craft felt and sew, embroider, or needlefelt decoration to the ears.
Cat Ear Base:
Anthony Ascione (photo)
Neko Manko Chan attached to Mo' Hair merkin.
click image to enlarge
Set up an area that you don't mind getting wet. I used an old metal tray lined with plastic wrap.
If you are using bar soap, shred about .125-25oz/5-10g soap into a shallow bowl or dish. Add a little hot water, being careful not to make the soap bubble too much. Carefully stir the soap until it dissolves. You want the dissolved soap to feel slimy, like liquid soap. If you are using liquid soap, water it down a touch.
Pull off a thin layer of white wool top/roving by grasping the very ends of the fibers and pulling firmly. Lay them down and keep pulling off layers and laying them side by side until you have a square roughly four inches. On the next layer, lay the fibers 90 degrees off from the layer below. Keep working this way until you have six layers or enough wool that you won't be able to see through it when felted.
You are essentially going to make your own craft felt here.
Sprinkle the stack of wool fibers gently with the soap mixture. You want enough to wet the fibers but not get them soaking.
Pat down the fibers to get them uniformly wet. The wool will stick to your fingers, but if you carefully smooth your hand in the direction of the top layer of fibers, they won't cling as much.
Once the fibers are all wet, start gently working your fingers in circles and back and forth on the wet fiber. Continue until you can pick up the piece without it starting to pull apart. Turn the piece over, fold over the sides like a hem to make straight edges, and work on the other side.
Test to see if the piece has felted by pinching a few fibers on top and seeing if you pick the whole piece of felt up. If you can, move on to the next step. If not, keep working the piece.
Pick the piece up and start really working at it. Where you had been gentle before, don't be. You can mash it up and rub it against itself, really put pressure into rubbing it with your hands and fingers, or even using a rough surface like a washboard or bamboo mat to rub it against. Keep turning the felt so that the action of the felting is even. Your goal here is a firm felt cloth.
Rinse with hot water. You can continue working if you feel it needs it. Rinse with cold water. The temperature change helps the felting. Squeeze out water out and lay flat to dry. You can use a hairdryer to speed the process, if you wish.
Cat Ear Spots:
Place the base felt on the foam pad in a well-lit area.
Decide how large you want your ears to be and mentally draw yourself some rough triangles on the base.
If you are using yarn scraps rather than roving, pull apart your black and brown yarn scraps until you have a small pile of fibers.
Take a small amount of colored fiber, twist around to make a small flat ball, and place on top of your base felt where you want a spot in your mental triangles. Take your felting needle and poke through both the fibers laid on top and through the base felt. This will start the fibers tangling together.
Keep poking until the brown fibers start to adhere. You can fold in the fibers at the edges to make a clearer line, but do not hold down the fibers with your fingers as you're trying to poke them down. Continue felting until the spot is firmly attached.
Keep making spots with the brown and black as you want.
Turn the piece over. As you will notice, the fibers have come all the way through so that you can see vague brown and black spots on the back side. You can either felt accompanying spots to this side, or just leave it as is. Trim the stray fibers close to the felt.
Weaving the Casing:
Cut out the ears from the base. Follow the directions for your craft glue and attach the back of the ears to the plate of the clip-on earring bases. None of the base should be visible when you are finished.
Cut a 3"/7.6cm or so piece of ribbon. String the bell onto the ribbon. Glue the ends of the ribbon together and then glue the overlap to a third earring base.
Voila! You can now dress up your pussy-dressing as a pussy.
Now fly your colors and declare your turf!
About
 contact Holly:
• legal info
contact Holly:
• legal info
![]()
home • antifesto • archive • errata • masthead • angstylvania • legal