

 |
 |
 |
 |
 |
 |
 |
 |
wa na na na na na na na bat shawl! > alia > parlor round >
fuck off, i'm trying to read > run away! > algormortis >
baba yaga > bonjour, nazar boncugu > impaler
Jessi Vowels (photo)
click to enlarge
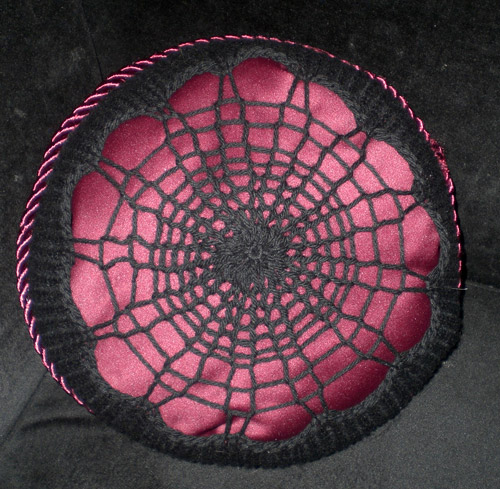
My spider's quite a busy roamer
Which is why I called her Homer.
She may not jump or twist or bend
But a spider is a girl's best friend
—Wednesday Addams
Suggested Watching
The Addams Family (1964-1966)
Difficulty
Boy Scout Princess
Click here for definitions of difficulty levels.
Finished Measurements
Approx. 11.5"/29cm in diameter.
Materials
- Cascade 220 [100% Peruvian Merino Wool; 220yd/per 100g skein] color: jet (black), 1 skein
- US size 9/5.5mm double pointed needles
- US size 9/5.5mm 16" circular knitting needle
- 1/2 yd lining fabric of your choice
- 3/4 yd cording (in coordinating color to lining)
- Sewing thread (in coordinating color to lining)
- Fiberfill
- Stitch markers
- Tapestry needle
Gauge
13 stitches and 16 rows per 4"/10cm in stockinette.
Design Notes
Gauge is important, and yet, not so important with this pattern. You need to be in the range of the given gauge for the spiderweb center to come out proportional. However, if you are off a stitch in either direction the pattern is a bit forgiving, being a pillow and all, and kind of self-determining in the size department.
If you must substitute yarn, heed my warnings and stay away from anything with a slippery content (silk, bamboo, perhaps even too much alpaca). For the web to hold its shape and look its best, you really need to use a sticky wool.
Special Stitches
Emily Ocker's Circular Cast-On can be found here:
http://www.spellingtuesday.com/circular_co.html
Spiderweb Pillow Face: (make two)
Using DPNs and Emily Ocker's Circular Cast-On, CO 13 sts. PM to mark beginning of rnd.
Next Rnd: *K1, YO*, rep from * to * until end. (26 sts)
K 5 rnds even.
Next Rnd: *K1, YO, K1*, rep from * to * until end. (39 sts)
K 2 rnds even.
Next Rnd: *K1, drop next two stitches, CO 6 sts (using circular cast-on)*, rep from * to * until end. (87 sts)
K 12 rnds even.
BO all sts VERY loosely. Weave in ends. Lightly steam block both knit pieces to suggested size.
Sew Lining Pillow:
Fold fabric in half with right sides facing (you'll be cutting both lining pieces at once here).
Pin one knit piece to fabric then, using chalk, trace around knit piece to make a cutting line, leaving at least 1/4" for seam allowance.
Remove knit piece and, using chalk guide, cut lining pieces.
With RS facing, sew along edges, remembering to leave a 2 inch opening for filling.
Turn lining inside out and fill, being careful not to overstuff. Sew opening shut.
Assemble Pillow:
Seam knit pieces until a little over halfway done. Place stuffed lining inside knit pieces; continue seaming around lining until lining is completely enclosed.
Weave in ends.
Whipstitch cording along seam, being careful to tuck raw ends into the knitted seam so they do not show.
About
contact Jessi:
• legal info
![]()
home • antifesto • this issue • archive • submit • errata • masthead • contact us • legal