

 |
 |
 |
 |
 |
 |
 |
 |
wa na na na na na na na bat shawl! > alia > parlor round >
fuck off, i'm trying to read > run away! > algormortis >
baba yaga > bonjour, nazar boncugu > impaler

Cate Garagan (photo)
click to enlarge

(Baba Yaga)
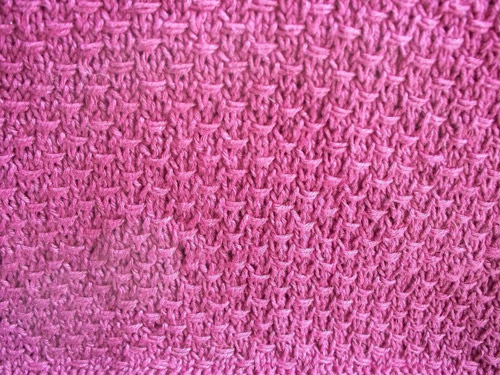
Baba Yaga, a witch from Russian folklore, lives in a hut that walks around on chicken legs and flies about in a giant mortar and pestle. Many stories exist about her, but one in particular struck a chord with me as a child, and I have always remembered it. In this story, Baba Yaga holds a young girl captive, forcing the child to sit at the loom and weave. I am not a weaver, but the weave-like texture of this messenger style bag reminds me of the story every time I see it.
Suggested Listening
A Coven of Witches Tales
told by Vincent Price; largely unavailable as it was originally released on vinyl, but we did find these mp3s:
"Baba Yaga"
"To Make a Witch Pockmarked"
"To Summon Another Witch"
Suggested Reading
A version of the tale mentioned can be found here: http://www.storiestogrowby.com/stories/babayaga_body.html
Difficulty
MoonPrincess RavenDark
Click here for definitions of difficulty levels.
Finished Measurements
9"/22.5cm H x 11"/27.5cm W x 4.5"/11.25cm D
Designed to hold a pattern or a magazine easily without folding, but yet not be too large or unwieldy.
Materials
- Hemp for Knitting Allhemp 6 [100% hemp; 165yd/150m per 3.5oz/100g skein]; color: 102 Aubergine; 5 skeins
- 1 set US #5/3.75mm straight needles (circular, if you prefer)
- Tapestry needle
- 2 magnetic snaps
- Fabric and thread for lining (optional, though recommended)
Gauge
24 sts and 28 rows make 4"/10cm in stockinette stitch.
Design Notes
Lesley Neily (photo)
click image to enlarge
Simple directions for how to line a bag can be found here:
http://www.futuregirl.com/craft_blog/2008/01/
tutorial-sew-lining-for-crocheted-bag.html
[Zabet's note: As I actually hold a degree in Russian, never mind that I've not had occasion to use it in a decade, I feel obligated to inform readers that the correct pronunciation is not BAAH-buh YAAH-guh, but BAAH-bah yah-GAAH. ::pats her expensive piece of paper::]
Special Stitches
DW (double wrap): Done on WS only. Move yarn to back of work. Slip two stitches from left needle to right needle. Move yarn to front of work. Slip two stitches from right needle back to left needle. Move yarn to back of work again. Slip two stitches back to right needle from left needle.
Weave Stitch:
Row 1 (RS): Knit all stitches.
Row 2 (WS): P1, *DW, p2* repeat to last stitch, p1.
Row 3: Knit all stitches
Row 4: P1 *p2, DW* repeat to last stitch, p1.
Front Panel
CO 74 sts.
Work in Weave Stitch until piece measures 9 inches from cast on edge. Make note of the number of rows, you will need this later.
BO on a knit row.
Back/Top/Front Flap (worked as a single piece)
CO 74 sts.
Work in Weave Stitch until piece measures 20 inches from cast on edge.
BO on a knit row.
Bottom Gusset/Side Gussets/Strap (worked as a single piece)
CO 28 sts.

Molly (model)
Lesley Neily (photo)
click image to enlarge
Work in stockinette until piece measures 11 inches from cast on edge.
Switch to Weave Stitch, and continue until piece measure 9 inches from start of Weave Stitch section. Note: you should have exactly the same number of rows in this section (just the Weave Stitch section) at this point as you have in the front panel. This is important, take the time to count.
Taper down to strap section as follows: on knit rows, k1, ssk, knit to last 3 stitches, k2tog, k1. Keep the wrong side rows in the weave pattern as written, being careful to keep it matched and consistent with the previous rows. Continue making decreases on knit rows until 12 stitches remain.
Resume Weave Stitch as written in notes section for 36 inches from end of taper section, or for as long as you would like the strap to be.

Cate Garagan (photo)
click image to enlarge
Increase back to second side as follows: on knit rows k1, m1 into next stitch, knit to last stitch, m1, k1. Maintain Weave Stitch pattern in the wrong side rows, again, being careful to keep it matched and consistent with the previous rows. Continue working increases in knit rows until back to 28 stitches.
Resume Weave Stitch as written in notes section for a further 9 inches (again, keeping the number of rows on this side section the same as the number of rows in the front panel, and the previous side section.) BO on a knit row.
Finishing
Being careful not to twist, sew the cast-on edge of the bottom/sides/strap piece to the bind-off edge of the same piece. Next, sew the cast-on edge of the front panel to one side of the stockinette section of the bottom/sides/strap piece. Being careful to match rows, attach the sides of the front panel to the side sections of the bottom/side/strap piece.
Next sew the bind-off edge of back/top/front flap section to the other side of the stockinette section of the bottom/sides/strap piece. As with the front piece, sew the sides of the back to the side sections of the bottom/sides/strap piece, being careful to match the rows. Weave in the ends. Block.
Attach magnetic snaps, following manufacturers directions, to the front flap and front panel pieces of the bag in desired locations. Line the bag as desired.
About
contact Cate:
• legal info
![]()
home • antifesto • this issue • archive • submit • errata • masthead • contact us • legal