

 |
 |
 |
 |
 |
 |
 |
 |
vertigo > barely concealed rage: a breakfast tray >
skull lariat > odob > surprise: aw, crap
Shannon Mock (photo)
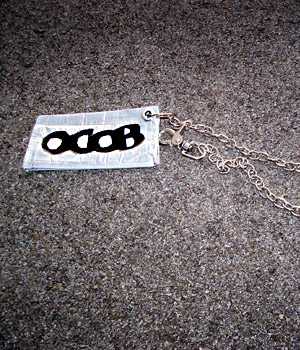
The word love will always mean love, right? Just like how odob will always mean... well, nothing—it's nonsense, right? Which is logical if you think about it as an adult, but what if you used a different logic
like a child's?
There was an instance of a child marking a green blob with the word ODOB. The child's caregiver asked, "What does ODOB mean?" The child replied, "Love." Words only have meaning once we give them meaning; this concept is simple and enormous at the same time.
Along came a need for me to make a very handy bus pass holder, so I turned it into my own little way of showing love to everyone who sees it.
Suggested Listening
"Lovefool" First Band on the Moon by The Cardigans
"You are The One" We are The Pilots by Shiny Toy Guns
Difficulty
Boy Scout Dropout
Click here for definitions of difficulty levels.
Finished Measurements
5" W x 5.5" H; length of chain is up to you.
Download
ODOB stencil (pdf format)
Materials
- Scissors
- Hobby knife
- Black duct tape
- Silver duct tape
- Pen
- Ruler
- Clear packaging tape
- Grommets
- Grommet tool (optional)
- Hammer
- 24" chain
- Clip or carabineer
Project Notes
Make blocks of tape by placing a strip of colored duct tape sticky side up on a flat surface. Place the next strip sticky side up halfway on top of the first. Repeat until the block is as big as you need. Then use the silver tape to cover the sticky side.
Get your materials ready before you start and have a clean flat surface.
Directions
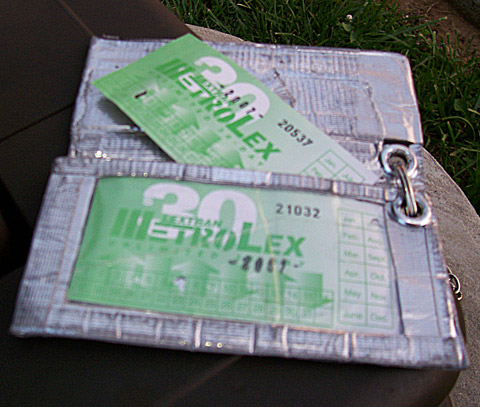
Shannon Mock (photo)
click image to enlarge
1. Make one block of silver that is 5" wide and 5.5" tall.
2. Trace the letters ODOB on the side. I chose to overlap my letters and make the D backwards to be more childlike. You can download a stencil to do it just like mine, or freehand it. (Download ODOB stencil if you haven't already.) Use the hobby knife to cut out the letters.
3. Make black block large enough to fit the word's outline. Attach to the backside of the sliver block with the word cut out. Cover with silver so it doesn'tt show on the inside.
4. Make a 2.5" silver block. Now, cut out a rectangle from the center of the block.
5. Take your clear packaging tape and wrap it around the the "frame" you made in step 4. This will get you a clear window to view your bus pass. It will take one complete wrap. (There will be minor imperfections. This is the way of packaging tape. You may want to practice before hand. Packaging tape is a pain in the butt.)
6. Now, attach the window to the larger section. Make sure you practice folding the big block, so then it wont be an imperfect fold. Attach these by ripping 5" long strips tape in half lengthwise. Now you have two thin pieces. You will connect the bottom of the window to the big block. You wont use much of the strip for the window or you risk covering the window up. Just use as much as to cover the edge of the window. Use the other part of the 5" piece to cover the other side of the bottom. Repeat this process with the sides. You will need 2.5" strips to connect the sides. Remember to not cover the window. It should just be a pocket.
7. Get ready to add grommets. Mark where you will place your grommets by folding the large silver piece in half and move in from from the fold about a half inch. Cut a small X into the tape ever so slightly to give it a place to go. Try not to cut the X too large or you will have a hole too big for your grommet to stay. Remember to mark the front AND back, as you will need a grommet on each side of the fold. (One for the cover/ODOB side and one for the bus pass pocket side.)
8. Wiggle your grommets into their holes and get your grommet tool (I am sure you dont have to use it. Its really the hammer that does the work here) and hammer. Now, you will place your grommet over your end (ugly end) of the grommets. Hammer till they are good and in.
9. Now, attach one end of the chain to the grommets and the clip or carabineer to the other end—ta da! Stick your pass in (you might want to place a sliver of tape over the top of the pocket to encourage it to stay shut at first, just in case). Attach your bus pass to your backpack, jeans or purse and go!
Finishing:
Feel free to go over edges with more duct tape to finish them and make them look more professional. Cover with clear packaging tape over the letters and image. Clear duct tape has lines on it which makes it cloudy and look cheap and icky.
About
![]()
home • antifesto • this issue • archive • submit • errata • masthead • contact us • legal