

 |
 |
 |
 |
 |
 |
 |
 |
Raellyn Hatter (photo)
Q: How is a raven like a writing desk?
A: Poe ate cake on both.
Ahahahahahahahahaha!
Suggested Watching
Edgar Allen Poe's "The Raven"
read by John Astin
Difficulty
Cut and Paste
Click here for definitions of difficulty levels.
Download
Raven Templates (pdf file)
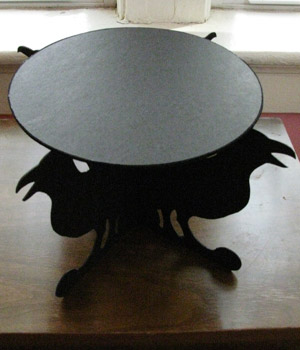
Finished Measurements
approximately 14"/35.5cm W x 14"/35.5cm D x 8"/20cm H
Materials
click image to enlarge
Raellyn Hatter (photo)
- Tape
- Pencil
- 1 sheet 20"x30" Strathmore® 400 Series Black Presentation Board
- Hobby knife
- Extra hobby knife blades
- Compass
- 400 grit sandpaper
- Fabri-tac™ Permanent Adhesive
- 32"/81cm of 3mm-wide flat, black suede cord
Design Notes
While any 3mm-wide ribbon will do in place of the black suede cord, it really matches the nearly light-absorbing flat blackness of the stand.
Keep in mind that ultimately, this is made of paper, so you'll need to take some precautions if you want to use it multiple times, like never putting any food items directly on it and keeping it away from heat and flame.
Step 1
Download the project templates. Cut out template pieces and assemble Raven Template A and Raven Template B with tape.
Step 2
Trace templates A and B onto your black presentation board with a pencil and cut out with your hobby knife. Change blades often to get the nicest cuts. Remember to cut out and discard any white areas in the templates as well.
Step 3
Use your compass on the WS of your presentation board to make two 10"/25.4cm-diameter circles. (Don't forget that you set a compass to the size of the radius, NOT the diameter.) Try to not poke a hole all the way through the presentation board where the compass rests on at least ONE circle. Cut out these circles.
Step 4
click image to enlarge
figure 1
On ONE circle (this one can have a pokey compass hole if it has to), cut out 2mm-wide by .5"/1.27cm-long notches at the 12:00, 3:00, 6:00, and 9:00 positions (fig. 1).
Step 5
With a thin, even layer of Fabri-tac™, glue the two circles together. Also glue the flat suede cord around the circumference of the double-thick circle to hide the cut edges.
Step 6
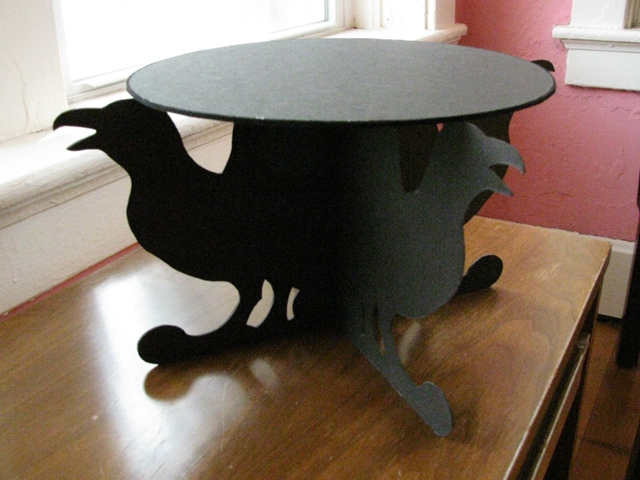
When the glue is dry, you can assemble your Writing Desk! (Yeah, have we mentioned this is actually a cake stand? Mebbe the riddle was a little obscure...?)
Stand up side B of the ravens on a table. Carefully slide side A of the ravens down onto it, so that the center slots align and lock the two pieces into an X shape.
Next, with the notched-side down, place the circle on top and fit the flat bits on top of each raven's head. Your stand is ready to go and will securely hold an astonishing bit of weight—much more than an average (or even kind of above average) cake.
If you plan on keeping it assembled, feel free to put glue in the circle's notches. Otherwise, it comes apart nicely to store flat.
About
 contact Raellyn:
• legal info
contact Raellyn:
• legal info
![]()
home • antifesto • this issue • archive • submit • errata • masthead • contact us • legal