

 |
Beltane 2010 |
 |
 |
 |
creeping jenny > nettled > lady macbeth

Sparrow Kelley (model/photo)
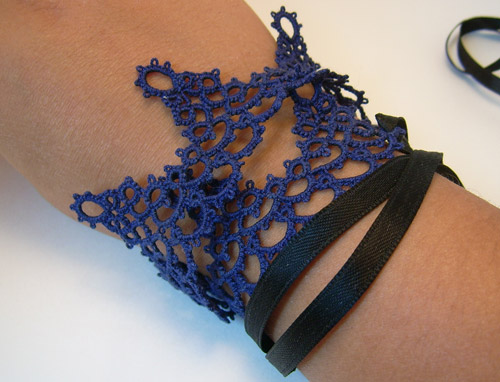
Tatted lace might sound like something from your grandma's coffee table, but this dark edging is far from that. This pattern looks like something from a gothic graveyard, and it's simple enough to do in your eternal sleep, which is great for beginning tatters.
Suggested Listening
"Still Doll" by Kanon Wakeshima
Suggested Reading
The Historian by Elizabeth Kostava
Difficulty
All Tied Up At the Moment
Click here for definitions of difficulty levels.
Finished Measurements
Approximately 1.5"/3.8cm H and as long as you like, depending on the number of repeats you do.
click image to enlarge
Sparrow Kelley (photo)
Download
Midnight Violets Diagram (pdf format)
Materials
- Size #20 tatting thread in your choice of color
- Tatting shuttle
- Matching or contrasting ribbon oddment
Design Notes
Special Thanks to M. Geiss-Mooney for test tatting the project and helping work out kinks. Her sunny yellow version can be seen at the bottom of the page, made with #20 Flora cordonnet tatting thread, color #225.
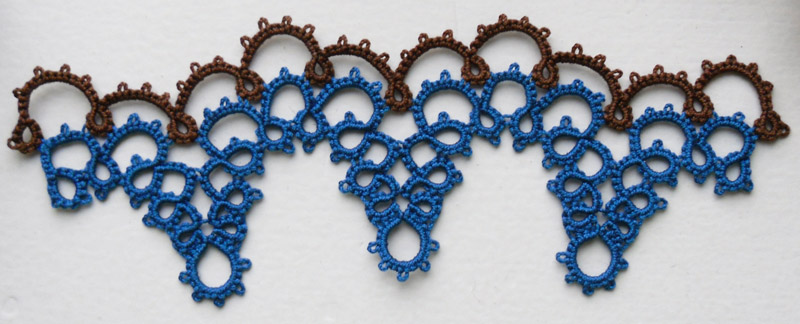
This pattern is basically a repeat of the sequence three double stitches, picot' the only thing to worry about is how many picots are in a ring and where to join.
In the diagram the numbers are NOT the number of stitches, but the sequence in which the rings and chains are made. Green numbers are chains and orange numbers are rings. The purple circles indicate where a join is located.
Written Pattern Key:
R: ring
Ch: chain
Rw: reverse work, or turn
# (In this case 3): number of double stitches
—: picot
+: join
click image to enlarge
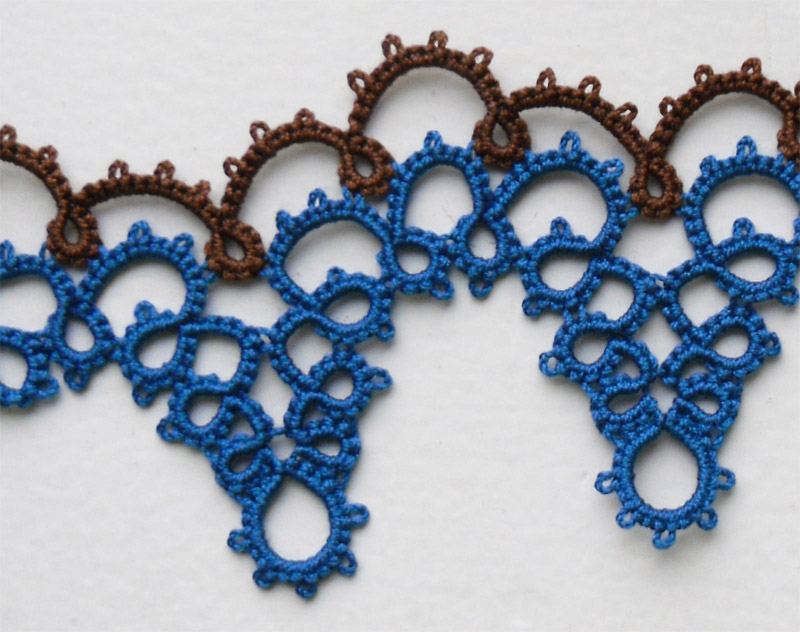
click here for super zoom
Sparrow Kelley (photo)
Row 1:
R1: 3 — 3 — 3 — 3 rw
Ch1: 3 — 3 — 3 — 3 rw
R2: 3 + 3 — 3 — 3 rw
Ch2: 3 — 3 — 3 — 3 — 3 rw
R3: 3 — 3 + 3 — 3 — 3 rw
Ch3: 3 — 3 rw
R4: 3 + 3 — 3 — 3 rw
Ch4: 3 rw
R5: 3 + 3 — 3
R6: 3 + 3 — 3 — 3 — 3 — 3 — 3 — 3
R7: 3 + 3 — 3
Ch5: 3 rw
R8: 3 + 3 — 3 — 3 rw
Ch6: 3 + 3 rw
R9: 3 + 3 — 3 — 3 — 3 rw
Ch7: 3 + 3 — 3 — 3 — 3 rw
Repeat from beginning for desired length, but change the first ring.
Work R1: 3 + 3 — 3 — 3 rw instead and in subsequent repeats.
After your final repeat, work the following:
R1: 3 + 3 — 3 — 3 rw
Ch1: 3 — 3 — 3 — 3 rw
R2: 3 + 3 — 3 — 3 rw
Row 2

click image to enlarge
M. Geiss-Mooney (photo)
R1: 3 — 3 + 3 rw
Ch1: 3 — 3 — 3 — 3 — 3 rw
R2: 3 + 3 + 3 rw
Ch2: 3 — 3 — 3 — 3 rw
R3: 3 + 3 + 3 rw
Ch3: 3 — 3 — 3 — 3 rw
Repeat for length of Row 1, joining where shown on the diagram, but change the first ring. Work R1: 3 + 3 + 3 instead and in subsequent repeats.
After your final repeat, work the following:
R1: 3 + 3 + 3 rw
Ch1: 3 — 3 — 3 — 3 — 3 rw
R2: 3 + 3 — 3 rw
Finishing
Attach a length of ribon to each end as a fastener.
About
 contact Sparrow:
• legal info
contact Sparrow:
• legal info
![]()
home • antifesto • archive • errata • masthead • angstylvania • legal